Self Timer Tips for Photographers // How to Improve Your Self Timer Shots

I do self timer photos with my family around 2-3 times each year. I often request them around my birthday or Mother’s Day when I have a good excuse to ask my family to do something that I know they don’t really enjoy (my husband is super helpful, but I never know what I’ll get with my four kids). I love what I get from the time I spend photographing my own family, but it is NOT easy by any means, especially as my kids get older and aren’t just happy to be held or explore like they were when they were toddlers. It takes effort, intentionality, planning, and the tips below!
And please know, friends: these tips were learned through many frustrating family photo attempts, and so much trial and error. Please don’t imagine me over here with four happy kids who are just naturals at posing for the camera, because that is not accurate! I get uncomfortable in front of the camera. I feel self conscious looking through images of myself. My kids may or may not cooperate. They make weird faces. I miss focus. The weather changes. Someone is crying. And so on! We are as real as they come, and that’s why I know how much of a difference these tips actually make. 😉
1. Make sure you have low expectations
The absolute most important part of a self timer session is making sure that you don’t expect to go home with the same type of gallery you’d give a client. In all likelihood, it won’t even be close! A self timer session cannot replace what another photographer would give your family, and you’ll be disappointed if you expect too much. I could literally take 600 images of my family (I click that remote constantly because everyone is moving), and end up with 20 I’m happy with. Of course if you only have one or two children, or you’re doing photos of yourself for branding/head shots, you may have a lot higher keep rate! But the point is that expectations should stay low. If you get any photos you love, call it a win!
2. Prepare far ahead of time
I’ve messed this one up many times, thinking I can easily throw together outfits last minute because I have a client closet and options available. Or I’m feeling indecisive and tell myself I can pick a location as we’re headed out the door. But last minute planning is rarely a good idea if you’re able to prep earlier. If you know you want to do photos, pick your outfits out just as far ahead of time as you tell your clients to pick them out, and set aside a couple hours before your shoot to do your hair and makeup, get everyone ready, etc. just like you would expect your clients to do.
Please note that I’m not saying you shouldn’t photograph your family without planned outfits or hair and makeup done – not at all! Photos of the typical day-to-day moments are so valuable and worth your while. But a self-timer shoot like I do with my family is about getting the photos I want on my walls – more like what I give to my clients than the fun moments I am always capturing on my phone.

3. Set aside more time than you think you need
So many times, I’ve told myself I just need 30 minutes to get a few photos of everyone, since I don’t want my kids to get bored or annoyed with the process. Turns out, I always always need longer! I now know to plan for around 90 minutes, and I can actually set accurate expectations with everyone from the beginning. It’s easier for kids to know that we’re spending a chunk of time on our photos, than to think it’ll be super quick and then for me to drag our time out.
Just take your time, and plan for it! There are always bumps in the road, and there’s no point in going through all the work of getting everyone ready and fed and looking great, just to run out of time without getting what you need from them.

Thankfully I set aside plenty of time for this shoot, because both our first location and the backup were unusable… spiders and mosquitos were out in full force! We spent our first hour just driving from one location to the next to the net, but we snagged some great shots at our third spot despite the setbacks.
4. Make sure everyone is comfortable
This one is almost as essential as the camera itself, ha! If my kids are cold, hungry, tired, etc. our time together will not be fun. Make sure they are comfortable in their outfits, that you have snacks and water in the car, and that they’re well rested. It’s easier to stretch kids’ bedtime or mealtime when you’re actually at a session with another photographer, because they’re around someone new and are distracted from their usual routine. But when it’s just the family, I find it to be much harder to distract them from the inconveniences.
5. Use a good remote
I have done self timer photos without a remote – whether it’s because I forgot my remote, or because I was standing too far from the camera for my cheap remote to work, or because I was using a film camera. Yes, I got a few great images from those sessions, but they were exhausting! It’s so much harder to shoot when you’re running back and forth with a timer, trying to get back into your pose before the shutter clicks.
I highly recommend a quality remote, preferably one that is actually from your camera manufacturer (here’s the one for my Sony). I’ve used the cheap, off-brand remotes in the past, and really didn’t have great results with them – they seemed to have a much shorter range that impacted how far I could stand from my camera, and were less reliable and harder to pair with my camera. The Sony remote I use now wasn’t cheap, but it was well worth the cost for my self timer sessions to run smoothly and it’ll last me years!

6. Up your aperture a little
When I’m photographing another family, my aperture is very often between f1.4 – f1.8. When I’m photographing my own family, I will do some shots wide open, but I also tend to stay around f1.8-f2.2. This is particularly true if I’m taking any shots of us closer to the camera, rather than full-body images. I love the look of wide open photos, but it’s more important to me that I can focus correctly on my family (and four moving children) than that my background is as soft as possible. Now, if my family were smaller, or if I were just doing photos of myself and 1-2 of my kids, it really wouldn’t be a problem to stay wide open for most shots.
Just use your best judgment. Don’t be afraid of wide open apertures, but do understand that it’s much more challenging to have a shallow depth of field when you’re photographing yourself than when you’re photographing someone else.
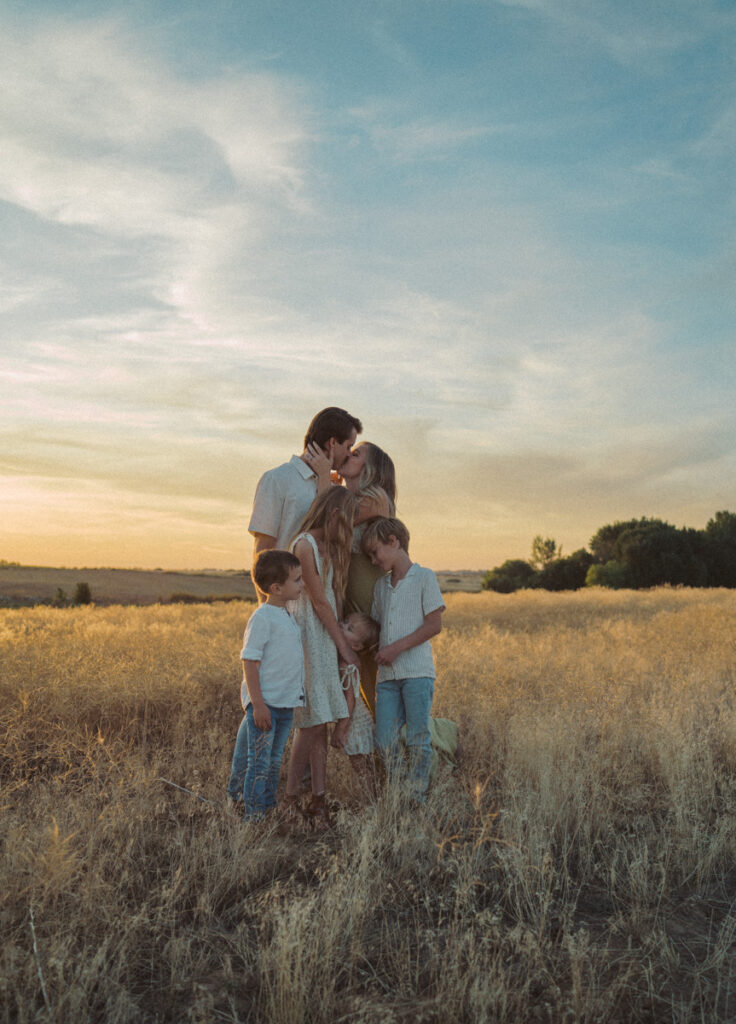
While I tend to shoot wide open, this shot was taken at f2.8 — partly because of my moving kids, and partly because of the pretty sky!
7. Use your LCD screen
When it comes to self timer photos, my Sony is incredible! I love that the LCD screen can flip out and be turned around (many newer cameras have this feature, and it’s great!). Because the screen moves, I can point the camera at myself, and position the screen so I can tell what’s in the frame or not. When I’m standing far away the screen is too small to be super helpful, but if I’m shooting with a 35mm lens, I can usually tell that my family is centered even if we’re far enough away to get a full body image. Using the screen this way is also extremely helpful for taking your own headshots and branding photos!

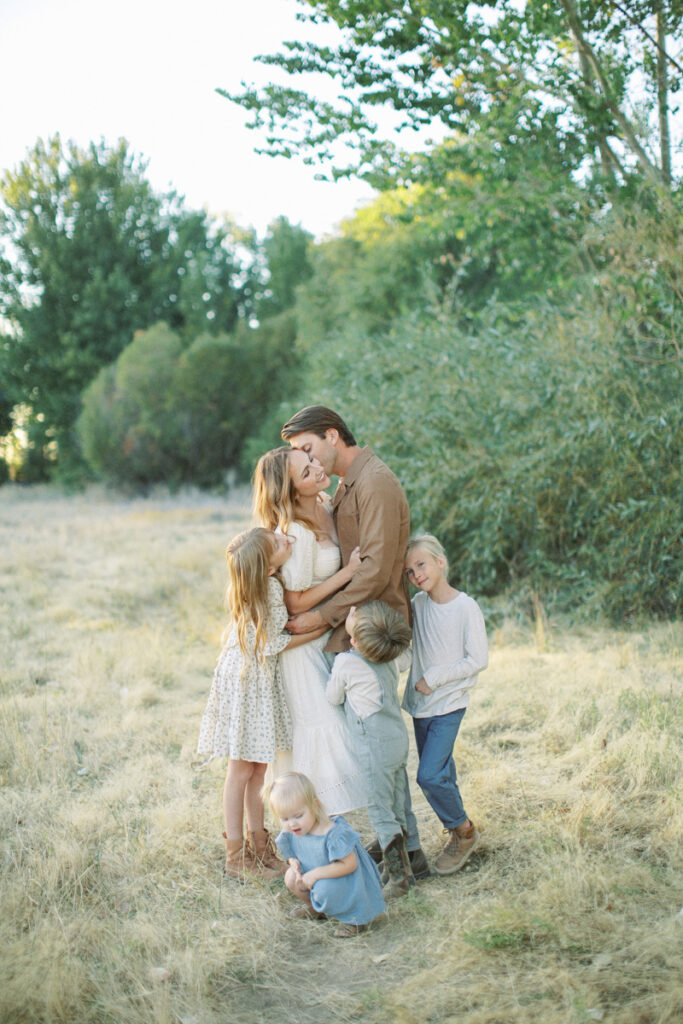
The LCD screen meant I could see exactly where we were in the frame from this distance!
8. Create a shot list
If you’ve gotten your hands on my posing course, The Art of Connection, you know that I really don’t do shot lists or poses. But when you’re taking your own photos, I recommend the exact opposite! Make sure you have your ideas saved, and that they’re achievable as a self timer shot. It’s extremely hard to be creative while corralling your own kids, and running through a simple shot list will keep your time on track and make sure you don’t get stuck.
9. Check your results as you go
Make sure you’re checking your images on your camera every few minutes – it’s too easy to not realize that you missed focus, or are standing awkwardly, or that your frame is crooked. And yes, I absolutely have done all of the above and more! 😉
10. Go somewhere quiet
I am not someone who wants to wrangle my family and a tripod and work through a self timer session with a crowd around. I always, always choose spaces where we can be almost completely alone and not worry about having an audience, not have to move out of people’s way, and not have accidental photo bombers in our background. It means my locations for my self timer shoots are much more limited than the ones I use for my clients, but the peace is well worth the tradeoff!
11. Be ready to do headswaps
I absolutely do not recommend shooting images that you know you’ll have to ‘fix’ in editing. However, when you’re trying to get multiple children to smile for a photo and there’s not even another human behind the camera, it’s very likely that you’ll be doing a couple head swaps on your images. I know my kids aren’t the only ones who try to pull off goofy faces here and there, or who suddenly want to ‘try out a new kind of smile’ and end up looking a little crazy in some of the photos. Head swaps can be a lifesaver when it comes to getting the classic portraits! 😉

12. Learn your own angles
Being in front of the camera takes practice. I’m not someone who has ever felt natural at it at ALL, but I have worked hard over the years to learn what angles I prefer being photographed from and to get comfortable with the experience.
When we photograph clients, we capture tons of images that they’d never want to see of themselves – goofy faces, awkward movements, etc. When we have to cull through our own photos, we get a front row seat to all of our awkward moments. So fun! But instead of being uncomfortable with this, just use it as a time to really think through what you were doing in the photos that you love, so you can repeat it more easily.
Having success with your self timer photos is not about being naturally photogenic – it’s about being willing to learn (through trial and error!) how you should be positioning yourself. It’s tough to do this without someone else guiding you through the shoot, but it’s absolutely possible to learn how to be comfortable and (at least somewhat) natural in front of the camera! It just takes practice. 🙂

I’ve been doing my own branding photos and headshots for years. It’s taken a LOT of practice and energy to get more comfortable with this, because I am not naturally comfortable in front of the camera at all. It may feel silly sometimes, but moving around a lot and doing your best to feel confident will both help you to look your very best. And yes, there will always be lots of photos we cull out because we don’t look great, but that’s part of the job for our clients too! Everyone looks bad in plenty of photos, so remember it’s just part of the process.
13. Reward your kids after
This is really for older kids more so than babies or toddlers, but it’s a very important part of making my sessions successful. I know my kids aren’t excited about doing photos, but I want them to know that I value their cooperation and the time they are spending with me doing something that’s important to me. I always try to plan an activity for after – it could be grabbing dinner together, going out for a treat, or even ordering pizza and watching a favorite show or movie together afterward. It’s not about bribing them, but about making our evening a good one together and showing my appreciation for them. Also, doing something special after photos means that they’ll look forward to it more the next time too!
14. Have fun!
Above all else, we have to do exactly what we tell our clients to do with their own kids: enjoy them! Remember that your self timer session can’t replace hiring a professional, and keep it as stress-free as possible (easier said than done, I know!). If your session feels stressful, your images won’t look good anyway, so it’s really not worth it to put pressure on yourself, your kids, or your spouse. Of course, that doesn’t mean your session will be a breeze (I think I have one grumpy kid at every session, really!), but it does mean to not sweat the things that aren’t going your way, to choose to goof off with your kids instead of spending your energy directing them, and to view every good image as a success even if you only end up with a few. The more I try to control, the less success I have. But when I let my kids take the ridiculous pictures with the silly faces and their crazy poses, and when I make sure not to get uptight about all the small things that go wrong, we really all do have a good time together and my images show the difference!
Self Timer Tips for Photographers // How to Level Up Your Self Timer Sessions

I’m a family photography educator based in Boise, ID. I am passionate about equipping my students with transformative, actionable education. I believe that EVERYONE can succeed in this industry with the right tools and knowledge, and I love to equip others so they can create the art they dream of and have thriving businesses.
If you’re new around here, get to know me through my free educational content! Make sure to sign up for my newsletter and snag some discounts.
If you’re ready to grow but you’re just dipping your toes into the educational world, browse my shop! I have high quality, budget-friendly offerings on important topics, and each offering delivers on value and impact.
And if you’re ready for major transformation, it’s time to check out my premier offerings! Enroll in The Art of Connection online course, discover Unbasic Creatives group coaching, or consider a one-on-one mentorship and styled shoot! These have already changed so many photographers’ businesses – and lives! – and they will change yours, too.


+ Comments